Imagine the following scenario:
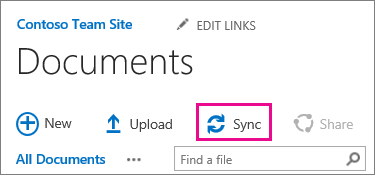
- A user syncs a SharePoint document library using OneDrive, so that he can have a local copy of the documents.
- When he doesn’t need them anymore, he deletes the documents from the machine (which is a sensible approach).
- OneDrive syncs the changes and deletes the documents in the SharePoint library.
- User notices that the documents were deleted, opens the recycle bin and restores them.
- One Drive syncs all the documents back to the SharePoint library and all is good again. NOT!
Even though all your documents are back into the SharePoint document library, they do not contain information about previous versions. This information is recorded against the original list item object. The original documents, containing the version history information are now in the site recycle bin. But, because OneDrive uploaded a new copy of the documents, you are unable to restore the deleted versions. This is because the library already contains a document with the same name.
This is simple to manually resolve if you only have a few documents affected. But what if we are talking about hundreds or thousands? And multiple libraries? Well, in this case, PnP PowerShell to the rescue!
Warning: the following instructions do not take into consideration documents that have been modified since the initial restore from OneDrive. You will have to plan for that – list views are a very useful tool to check documents modified recently.
1 – Rename documents restored by OneDrive
Let’s start by renaming the existing documents, that were restored by OneDrive when the user restored the local deleted folder.
The following script renames all the items on the document library by adding “old_delete_” to the current document name. This is just a “unique” sample reference that we are adding to be able to delete the correct documents later.
# Rename
Get-PnPListItem -List "XXXXXXXXXXXXXXX" -PageSize 1000 -ScriptBlock { Param($items) $items.Context.ExecuteQuery() } | % { $item = (Get-PnPListItem -List "XXXXXXXXXXXXXXX" -Id $_.Id -Fields "FileLeafRef","FileRef").FieldValues; Rename-PnPFile -ServerRelativeUrl $item.FileRef -TargetFileName "old_delete_$($item.FileLeafRef)" -OverwriteIfAlreadyExists -Force }
2 – Restore original documents
After we rename the documents in the document library, we can restore the ones from the SharePoint site recycle bin.
The following script queries the recycle bin for all the items that march a specific condition: DirName contains a specific string. This condition allows us to select deleted documents that belong to a specific document library. For example, documents/test for a test folder within Documents library. But you can also add more conditions if required. All the items that match the criteria will then be restored.
# Restore
Get-PnPRecycleBinItem | ? DirName -like "*XXXXXXXXXXXXXXX*" | Restore-PnpRecycleBinItem -Force
3 – Delete documents restored by OneDrive
Now that all the original items were restored, we can delete the ones that were restored by OneDrive. These are the ones that do not contain the version history.
The following script queries the document library for all the documents that contain our custom string on the name. “old_delete_” in this example. And finally moves them to the recycle bin.
# Delete
Get-PnPListItem -List "XXXXXXXXXXXXXXX" -PageSize 1000 -ScriptBlock { Param($items) $items.Context.ExecuteQuery() } | % { $item = (Get-PnPListItem -List "XXXXXXXXXXXXXXX" -Id $_.Id -Fields "FileLeafRef","FileRef").FieldValues; if($item.FileLeafRef -like "*old_delete_*") { Move-PnPListItemToRecycleBin -List "XXXXXXXXXXXXXXX" -Identity $_.Id -Force } }
